From signing in to your first query and your first AI agent connection.
This walks a new member from nothing to a working query and a connected agent. Each step names the
button you’re looking for.
On a brand-new tenant, the Overview page covers this same ground itself. Its Get started card
leads with one prompt for your coding agent (see Your first run); Set
up by hand instead opens the step-by-step checklist: Connect your data, Bring your terminal
and AI tool, and Build your artifact, publish it as an app. Each step marks itself done as
your tenant’s own data shows it happened, not by you checking a box.
1
Sign in
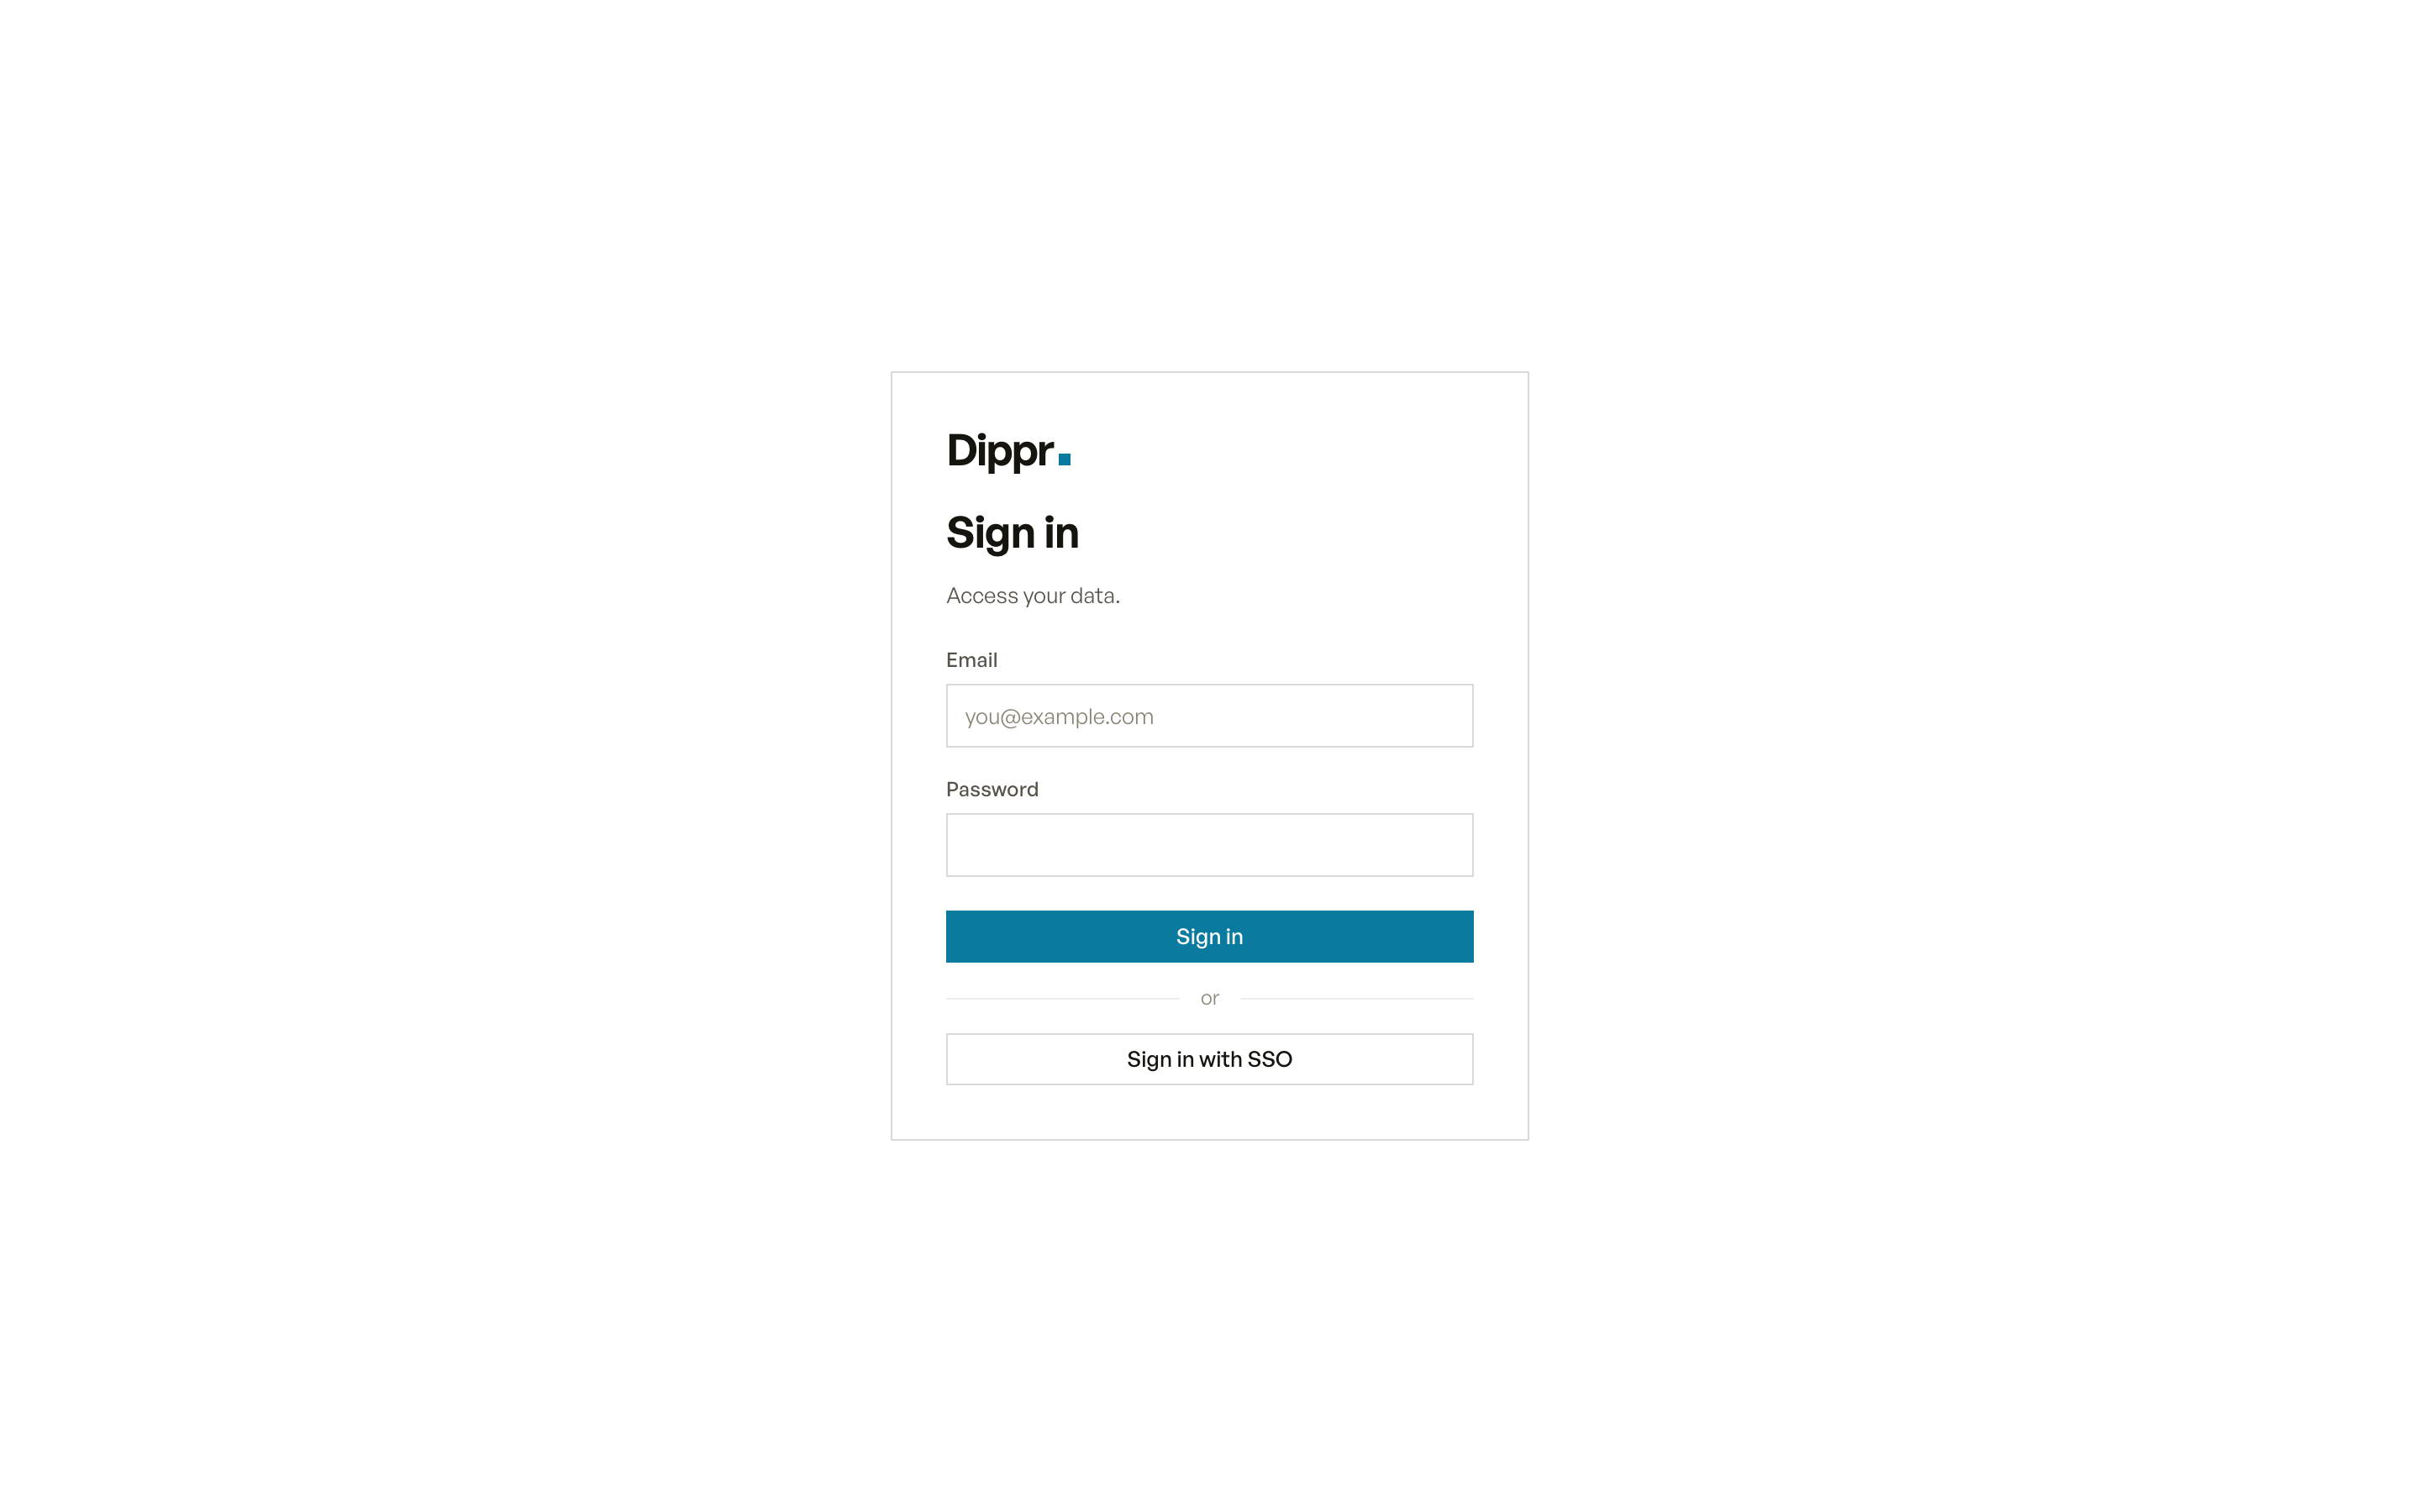
Go to your tenant’s URL (for example acme.app.us.dippr.ai) and sign in with your
password, or with “Sign in with SSO” if your tenant uses one. If you got here from an
invitation link instead, open it, choose a password, and click Go to sign in.
Don’t have a tenant to join? See Create a tenant to sign
up on your own, with no invitation needed.
The sign-in page.
2
Be added, or accept an invite
Someone with the account_admin role adds you from Settings → Users, clicking
Invite user and choosing your roles. Dippr doesn’t send an email: the admin copies the
one-time link and sends it to you themselves. The link expires if unused; opening it and setting
a password is what creates your account.
3
Connect a source
Go to Data sources and open the Add integration tab. Click the card for the kind you
want (Postgres, Snowflake, ClickHouse, Google Sheets, DuckDB, or an Iceberg REST catalog); its
form opens already set to that kind. Fill in the connection details and click Connect. When
the source can be probed, Connect tests it first and won’t save if that test fails, unless you
explicitly check Register anyway, without a verified connection — so a saved integration is
normally one Dippr actually reached, not just one you typed.The Capabilities column on the Connected row is set automatically from the source kind — you
don’t choose them. Every kind that can be queried is marked Queryable from engines by default,
so a database source becomes a catalog on your engines without any extra step. (A cloud-credential
kind, which nothing queries directly, simply doesn’t offer that capability.)Note which data plane you register the source on. An engine only sees sources on its own
plane, so if your tenant has more than one, pick the same plane here that you’ll create the engine
on in the next steps — otherwise the engine’s catalog set comes up empty.
No source to connect yet? On the Overview page’s Get started card, click
Use sample data. Dippr adds a small read-only avocado prices sample dataset as a
catalog, hosted for you — no credentials, no file to upload — so you can reach a first query
immediately. Once you have an engine, query it with
SELECT * FROM <catalog>.main.avocado_prices LIMIT 5 (the catalog is named for the sample).
Remove it any time from the Data sources page.
4
Confirm your data plane is connected
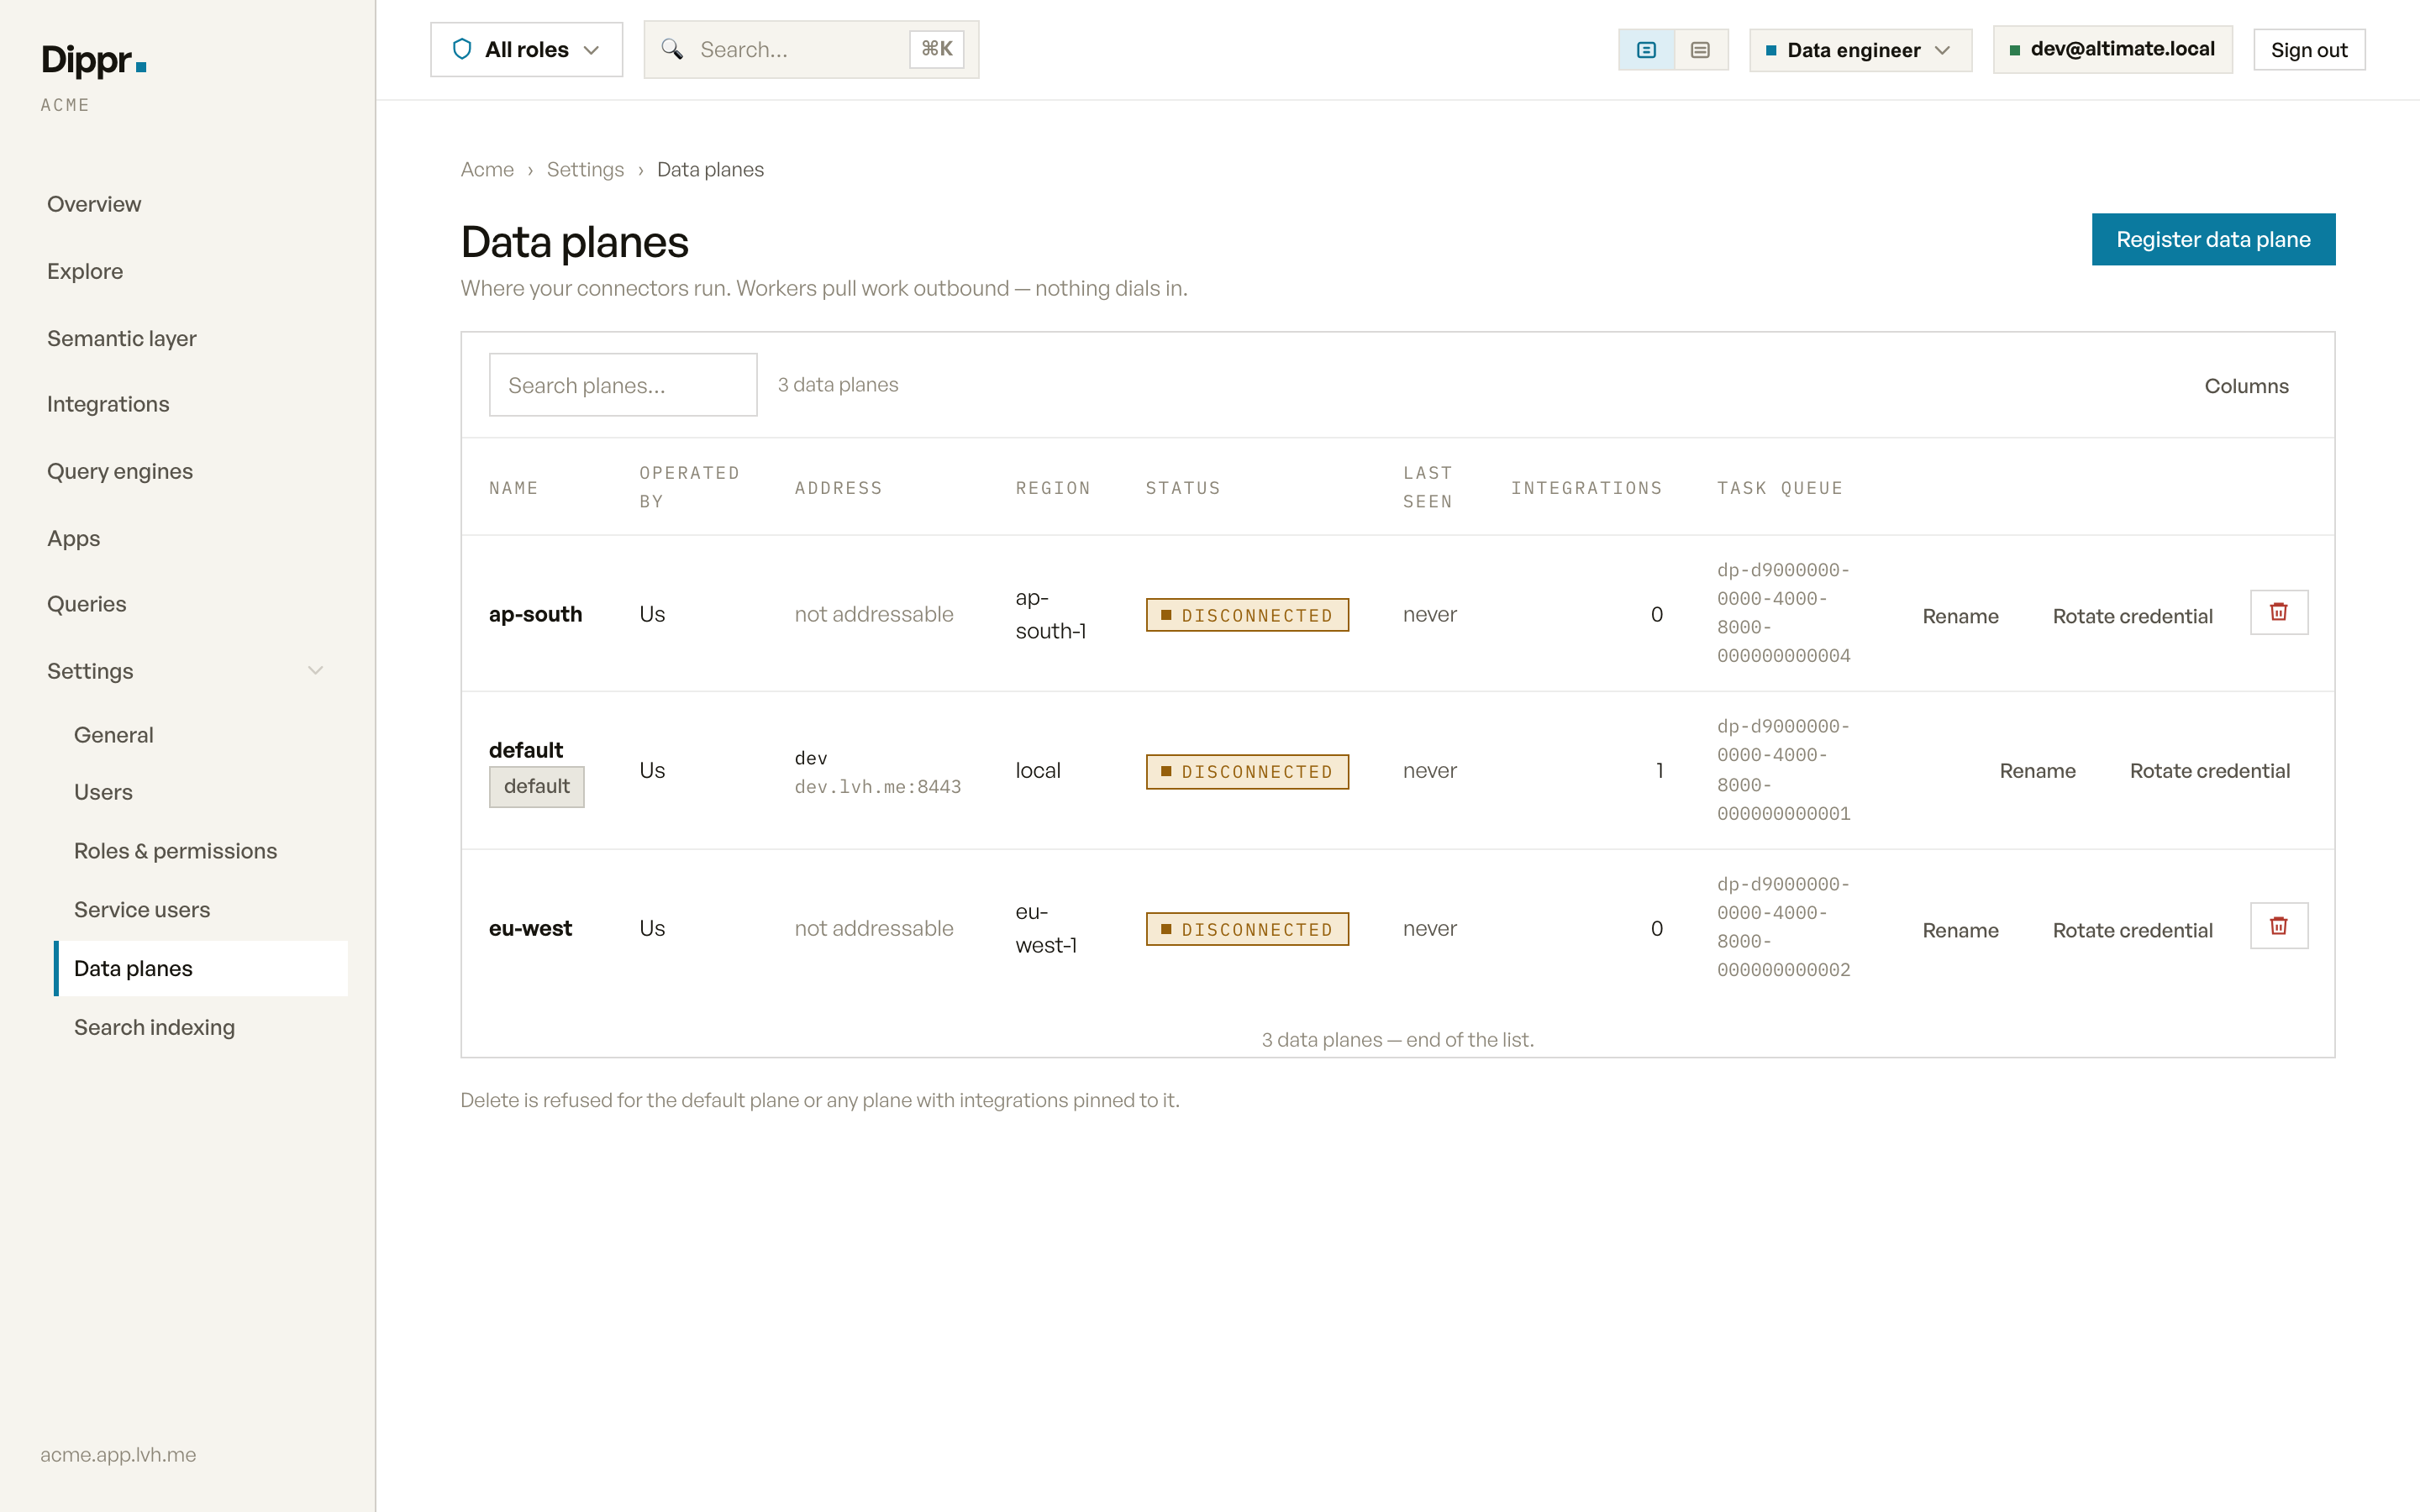
Most tenants start on Dippr’s own data plane, already connected. Check
Settings → Data planes for a Connected status badge. If your tenant runs a separated
data plane inside your own cloud account, this is where you confirm it has come online
before continuing.
Settings › Data planes: the registered planes and their connection status.
5
Create an engine
Go to Settings → Query engines and click Create engine. Choose a size from the
ones your plan allows (xs on Free; up to m on Team; up to xl or custom on Enterprise;
see Entitlements) and the data plane to run it in — the same plane
as the source you just connected, since an engine only serves sources on its own plane. The
engine’s first catalog set, built from the queryable sources on that
plane, applies automatically. Wait for its power state to reach Ready before you query it.
6
Apply catalogs
Connecting a queryable source, or a new workspace database starting to serve, changes what an
engine’s catalogs would be, but an engine only reads catalogs at startup. When a row shows pending changes,
click Apply, then confirm Apply and restart. This briefly restarts the engine and
interrupts anything running on it, so do it when nothing time-sensitive is mid-query.
7
Run your first query
Open Explore, open a new query tab, write a statement against a catalog you
connected, and press Run (⌘↵). Every queryable source you connected and applied on this
engine’s plane appears as a catalog here. Results stream to your browser straight from your data
plane. From here you can save the query, or open one of the tables you queried and switch to
its Lineage tab to see what feeds it.
8
Connect Claude via MCP
From a terminal, install dip and sign in:
dip login https://acme.app.us.dippr.ai
Signing in registers your tenant’s MCP servers with the coding agents on your machine as
its last step, so Claude (or Codex, or Cursor) can immediately run SQL and search your
metadata as you. Run it again any time with dip mcp install. See
Install dip and sign in.
9
Optional: share a data app
Ask your connected agent to build a Dippr app your team can open. Preview it, then publish with
dip app push and run dip app install. Confirm the exact version’s access and code trust once;
dip waits for a ready app and gives you its link. Members can publish and install their own
static apps by default. Each colleague opening the link queries with their own access.
Docker and buildx are required on the publishing computer.No terminal? In Claude or ChatGPT on the web, ask your AI: “Publish this as a Dippr app.” It
publishes the page as you through the Dippr connector and gives you the link. See
Publishing an app from chat.See Build and share your first app for the whole journey, step by step,
and Install an app for the console alternative.
Where next
How Dippr fits together
The full vocabulary behind every step above.
Roles and personas
Who on your team needs which of these sections.
Semantic layer
Turn your tables into certified metrics everyone can trust.
MCP and AI agents
What an agent can and can’t do once it’s connected.
{"docsConfig":{"theme":"mint","$schema":"https://mintlify.com/docs.json","name":"Dippr","description":"Dippr product documentation: connect your data, run federated queries, govern access, and expose it all to AI agents.","colors":{"primary":"#0B7A9F","light":"#1289B0","dark":"#08627F"},"logo":{"light":"/logo/light.svg","dark":"/logo/dark.svg"},"favicon":"/favicon.svg","appearance":{"default":"light","strict":false},"navbar":{"links":[{"href":"https://dippr.ai","label":"dippr.ai"}]},"seo":{"metatags":{"og:image":"https://docs.dippr.ai/images/social-card.png","twitter:image":"https://docs.dippr.ai/images/social-card.png"},"organization":{"name":"Dippr","url":"https://dippr.ai","logo":"https://docs.dippr.ai/logo/organization.svg"}},"contextual":{"options":["copy","view","chatgpt","claude"],"display":"header"},"integrations":{"telemetry":{"enabled":false}},"navigation":{"pages":[]}},"deployment":{"deploymentMetadataValue":{"hasAudioNarration":false,"customDomains":[],"gitSource":{"type":"github","owner":"local","repo":"local","deployBranch":"main","contentDirectory":"","isPrivate":true,"mountPath":"","label":"local","isBase":true},"buildId":"local","clientVersion":"0.0.4145"},"basePath":"","hasChatPermissions":false,"hasWebMcpPermissions":false,"toggles":[],"googleFontsInlined":false,"isLoggedInCli":false,"mintExport":{}},"customCss":[],"page":{"pagePath":"get-started/quickstart","slug":"/get-started/quickstart","pageMetadata":{"title":"Quickstart","description":"From signing in to your first query and your first AI agent connection.","href":"/get-started/quickstart"},"description":{"compiledSource":"\"use strict\";\nconst {jsx: _jsx} = arguments[0];\nconst {useMDXComponents: _provideComponents} = arguments[0];\nfunction _createMdxContent(props) {\n const _components = {\n p: \"p\",\n ..._provideComponents(),\n ...props.components\n };\n return _jsx(_components.p, {\n children: \"From signing in to your first query and your first AI agent connection.\"\n });\n}\nfunction MDXContent(props = {}) {\n const {wrapper: MDXLayout} = {\n ..._provideComponents(),\n ...props.components\n };\n return MDXLayout ? _jsx(MDXLayout, {\n ...props,\n children: _jsx(_createMdxContent, {\n ...props\n })\n }) : _createMdxContent(props);\n}\nreturn {\n default: MDXContent\n};\n","frontmatter":{},"scope":{}},"pageType":"default","mdx":{"mdxSource":{"compiledSource":"\"use strict\";const{Fragment:_Fragment,jsx:_jsx,jsxs:_jsxs}=arguments[0];const{useMDXComponents:_provideComponents}=arguments[0];function _createMdxContent(props){const _components={a:`a`,code:`code`,p:`p`,pre:`pre`,span:`span`,strong:`strong`,..._provideComponents(),...props.components},{Card,CardGroup,CodeBlock,Frame,Heading,OptimizedImage,Step,Steps,Tip}=_components;if(!Card)_missingMdxReference(`Card`,true);if(!CardGroup)_missingMdxReference(`CardGroup`,true);if(!CodeBlock)_missingMdxReference(`CodeBlock`,true);if(!Frame)_missingMdxReference(`Frame`,true);if(!Heading)_missingMdxReference(`Heading`,true);if(!OptimizedImage)_missingMdxReference(`OptimizedImage`,true);if(!Step)_missingMdxReference(`Step`,true);if(!Steps)_missingMdxReference(`Steps`,true);if(!Tip)_missingMdxReference(`Tip`,true);return _jsxs(_Fragment,{children:[_jsx(_components.p,{children:`This walks a new member from nothing to a working query and a connected agent. Each step names the\nbutton you’re looking for.`}),`\n`,_jsx(Tip,{children:_jsxs(_components.p,{children:[`On a brand-new tenant, the Overview page covers this same ground itself. Its `,_jsx(_components.strong,{children:`Get started`}),` card\nleads with one prompt for your coding agent (see `,_jsx(_components.a,{href:`/get-started/first-run`,children:`Your first run`}),`); `,_jsx(_components.strong,{children:`Set\nup by hand instead`}),` opens the step-by-step checklist: `,_jsx(_components.strong,{children:`Connect your data`}),`, `,_jsx(_components.strong,{children:`Bring your terminal\nand AI tool`}),`, and `,_jsx(_components.strong,{children:`Build your artifact, publish it as an app`}),`. Each step marks itself done as\nyour tenant’s own data shows it happened, not by you checking a box.`]})}),`\n`,_jsxs(Steps,{children:[_jsxs(Step,{title:`Sign in`,children:[_jsxs(_components.p,{children:[`Go to your tenant’s URL (for example `,_jsx(_components.code,{children:`acme.app.us.dippr.ai`}),`) and sign in with your\npassword, or with “Sign in with SSO” if your tenant uses one. If you got here from an\ninvitation link instead, open it, choose a password, and click `,_jsx(_components.strong,{children:`Go to sign in`}),`.\nDon’t have a tenant to join? See `,_jsx(_components.a,{href:`/get-started/create-a-workspace`,children:`Create a tenant`}),` to sign\nup on your own, with no invitation needed.`]}),_jsx(Frame,{caption:`The sign-in page.`,children:_jsx(OptimizedImage,{src:`/images/screenshots/quickstart-signin.png`,alt:`The sign-in page`})})]}),_jsx(Step,{title:`Be added, or accept an invite`,children:_jsxs(_components.p,{children:[`Someone with the `,_jsx(_components.code,{children:`account_admin`}),` role adds you from `,_jsx(_components.strong,{children:`Settings → Users`}),`, clicking\n`,_jsx(_components.strong,{children:`Invite user`}),` and choosing your roles. Dippr doesn’t send an email: the admin copies the\none-time link and sends it to you themselves. The link expires if unused; opening it and setting\na password is what creates your account.`]})}),_jsxs(Step,{title:`Connect a source`,children:[_jsxs(_components.p,{children:[`Go to `,_jsx(_components.strong,{children:`Data sources`}),` and open the `,_jsx(_components.strong,{children:`Add integration`}),` tab. Click the card for the kind you\nwant (Postgres, Snowflake, ClickHouse, Google Sheets, DuckDB, or an Iceberg REST catalog); its\nform opens already set to that kind. Fill in the connection details and click `,_jsx(_components.strong,{children:`Connect`}),`. When\nthe source can be probed, Connect tests it first and won’t save if that test fails, unless you\nexplicitly check `,_jsx(_components.strong,{children:`Register anyway, without a verified connection`}),` — so a saved integration is\nnormally one Dippr actually reached, not just one you typed.`]}),_jsxs(_components.p,{children:[`The `,_jsx(_components.strong,{children:`Capabilities`}),` column on the Connected row is set automatically from the source kind — you\ndon’t choose them. Every kind that can be queried is marked `,_jsx(_components.strong,{children:`Queryable from engines`}),` by default,\nso a database source becomes a catalog on your engines without any extra step. (A cloud-credential\nkind, which nothing queries directly, simply doesn’t offer that capability.)`]}),_jsxs(_components.p,{children:[`Note which `,_jsx(_components.strong,{children:`data plane`}),` you register the source on. An engine only sees sources on its own\nplane, so if your tenant has more than one, pick the same plane here that you’ll create the engine\non in the next steps — otherwise the engine’s catalog set comes up empty.`]}),_jsx(Tip,{children:_jsxs(_components.p,{children:[`No source to connect yet? On the Overview page’s `,_jsx(_components.strong,{children:`Get started`}),` card, click\n`,_jsx(_components.strong,{children:`Use sample data`}),`. Dippr adds a small read-only `,_jsx(_components.strong,{children:`avocado prices`}),` sample dataset as a\ncatalog, hosted for you — no credentials, no file to upload — so you can reach a first query\nimmediately. Once you have an engine, query it with\n`,_jsx(_components.code,{children:`SELECT * FROM \u003ccatalog>.main.avocado_prices LIMIT 5`}),` (the catalog is named for the sample).\nRemove it any time from the Data sources page.`]})})]}),_jsxs(Step,{title:`Confirm your data plane is connected`,children:[_jsxs(_components.p,{children:[`Most tenants start on Dippr’s own data plane, already connected. Check\n`,_jsx(_components.strong,{children:`Settings → Data planes`}),` for a `,_jsx(_components.strong,{children:`Connected`}),` status badge. If your tenant runs a separated\ndata plane inside your own cloud account, this is where you confirm it has come online\nbefore continuing.`]}),_jsx(Frame,{caption:`Settings › Data planes: the registered planes and their connection status.`,children:_jsx(OptimizedImage,{src:`/images/screenshots/quickstart-dataplane.png`,alt:`Settings › Data planes: the registered planes and their connection status`})})]}),_jsx(Step,{title:`Create an engine`,children:_jsxs(_components.p,{children:[`Go to `,_jsx(_components.strong,{children:`Settings → Query engines`}),` and click `,_jsx(_components.strong,{children:`Create engine`}),`. Choose a size from the\nones your plan allows (`,_jsx(_components.code,{children:`xs`}),` on Free; up to `,_jsx(_components.code,{children:`m`}),` on Team; up to `,_jsx(_components.code,{children:`xl`}),` or `,_jsx(_components.code,{children:`custom`}),` on Enterprise;\nsee `,_jsx(_components.a,{href:`/reference/entitlements`,children:`Entitlements`}),`) and the data plane to run it in — the `,_jsx(_components.strong,{children:`same plane`}),`\nas the source you just connected, since an engine only serves sources on its own plane. The\nengine’s first catalog set, built from the queryable sources on that\nplane, applies automatically. Wait for its power state to reach `,_jsx(_components.strong,{children:`Ready`}),` before you query it.`]})}),_jsx(Step,{title:`Apply catalogs`,children:_jsxs(_components.p,{children:[`Connecting a queryable source, or a new workspace database starting to serve, changes what an\nengine’s catalogs would be, but an engine only reads catalogs at startup. When a row shows pending changes,\nclick `,_jsx(_components.strong,{children:`Apply`}),`, then confirm `,_jsx(_components.strong,{children:`Apply and restart`}),`. This briefly restarts the engine and\ninterrupts anything running on it, so do it when nothing time-sensitive is mid-query.`]})}),_jsx(Step,{title:`Run your first query`,children:_jsxs(_components.p,{children:[`Open `,_jsx(_components.strong,{children:`Explore`}),`, open a new query tab, write a statement against a catalog you\nconnected, and press `,_jsx(_components.strong,{children:`Run`}),` (`,_jsx(_components.code,{\"data-symbols\":`true`,children:`⌘↵`}),`). Every queryable source you connected and applied on this\nengine’s plane appears as a catalog here. Results stream to your browser straight from your data\nplane. From here you can save the query, or open one of the tables you queried and switch to\nits `,_jsx(_components.strong,{children:`Lineage`}),` tab to see what feeds it.`]})}),_jsxs(Step,{title:`Connect Claude via MCP`,children:[_jsxs(_components.p,{children:[`From a terminal, install `,_jsx(_components.code,{children:`dip`}),` and sign in:`]}),_jsx(CodeBlock,{numberOfLines:`1`,language:`shellscript`,children:_jsx(_components.pre,{className:`shiki shiki-themes github-light-default dark-plus`,style:{backgroundColor:`#ffffff`,\"--shiki-dark-bg\":`#0B0C0E`,color:`#1f2328`,\"--shiki-dark\":`#D4D4D4`},language:`shellscript`,children:_jsxs(_components.code,{language:`shellscript`,numberOfLines:`1`,children:[_jsxs(_components.span,{className:`line`,children:[_jsx(_components.span,{style:{color:`#953800`,\"--shiki-dark\":`#DCDCAA`},children:`dip`}),_jsx(_components.span,{style:{color:`#0A3069`,\"--shiki-dark\":`#CE9178`},children:` login`}),_jsx(_components.span,{style:{color:`#0A3069`,\"--shiki-dark\":`#CE9178`},children:` https://acme.app.us.dippr.ai`})]}),`\n`]})})}),_jsxs(_components.p,{children:[`Signing in registers your tenant’s MCP servers with the coding agents on your machine as\nits last step, so Claude (or Codex, or Cursor) can immediately run SQL and search your\nmetadata as you. Run it again any time with `,_jsx(_components.code,{children:`dip mcp install`}),`. See\n`,_jsx(_components.a,{href:`/cli/install-and-login#connecting-your-coding-agent`,children:`Install dip and sign in`}),`.`]})]}),_jsxs(Step,{title:`Optional: share a data app`,children:[_jsxs(_components.p,{children:[`Ask your connected agent to build a Dippr app your team can open. Preview it, then publish with\n`,_jsx(_components.code,{children:`dip app push`}),` and run `,_jsx(_components.code,{children:`dip app install`}),`. Confirm the exact version’s access and code trust once;\n`,_jsx(_components.code,{children:`dip`}),` waits for a ready app and gives you its link. Members can publish and install their own\nstatic apps by default. Each colleague opening the link queries with their own access.\nDocker and buildx are required on the publishing computer.`]}),_jsxs(_components.p,{children:[`No terminal? In Claude or ChatGPT on the web, ask your AI: “Publish this as a Dippr app.” It\npublishes the page as you through the Dippr connector and gives you the link. See\n`,_jsx(_components.a,{href:`/mcp/tools#publishing-an-app-from-chat`,children:`Publishing an app from chat`}),`.`]}),_jsxs(_components.p,{children:[`See `,_jsx(_components.a,{href:`/get-started/first-app`,children:`Build and share your first app`}),` for the whole journey, step by step,\nand `,_jsx(_components.a,{href:`/apps/install-and-consent`,children:`Install an app`}),` for the console alternative.`]})]})]}),`\n`,_jsx(Heading,{level:`2`,id:`where-next`,children:`Where next`}),`\n`,_jsxs(CardGroup,{cols:2,children:[_jsx(Card,{title:`How Dippr fits together`,icon:`book`,href:`/get-started/concepts`,children:_jsx(_components.p,{children:`The full vocabulary behind every step above.`})}),_jsx(Card,{title:`Roles and personas`,icon:`users`,href:`/get-started/roles-and-personas`,children:_jsx(_components.p,{children:`Who on your team needs which of these sections.`})}),_jsx(Card,{title:`Semantic layer`,icon:`diagram-project`,href:`/semantic/overview`,children:_jsx(_components.p,{children:`Turn your tables into certified metrics everyone can trust.`})}),_jsx(Card,{title:`MCP and AI agents`,icon:`robot`,href:`/mcp/overview`,children:_jsx(_components.p,{children:`What an agent can and can’t do once it’s connected.`})})]})]})}function MDXContent(props={}){const{wrapper:MDXLayout}={..._provideComponents(),...props.components};return MDXLayout?_jsx(MDXLayout,{...props,children:_jsx(_createMdxContent,{...props})}):_createMdxContent(props)}return{default:MDXContent};function _missingMdxReference(id,component){throw new Error(`Expected `+(component?`component`:`object`)+\" `\"+id+\"` to be defined: you likely forgot to import, pass, or provide it.\")}","frontmatter":{},"scope":{"config":{},"pageMetadata":{"title":"Quickstart","description":"From signing in to your first query and your first AI agent connection.","href":"/get-started/quickstart"}}},"mdxSourceWithNoJs":null},"mdxExtracts":{"tableOfContents":[{"title":"Where next","slug":"where-next","depth":2,"children":[]}],"codeExamples":{}},"jsLinks":[],"subdomain":"localhost","siteName":"Dippr","title":"Quickstart - Dippr","navMaps":{"firstHrefInVersion":{},"firstHrefInLanguage":{}},"originalFileLocation":"get-started/quickstart.mdx"},"headHtml":"\u003cscript data-mint-head>(function(){var d=document.documentElement,p=null;if(!p){try{p=localStorage.getItem(\"isDarkMode\")}catch(e){}if(p==='true')p='dark';else if(p==='false')p='light';if(p!=='light'\u0026\u0026p!=='dark'\u0026\u0026p!=='system')p=\"light\"}var r=p==='system'?(matchMedia(\"(prefers-color-scheme: dark)\").matches?'dark':'light'):p;d.classList.remove(r==='dark'?'light':'dark');d.classList.add(r);d.setAttribute(\"data-theme-preference\",p)})();\u003c/script>\u003cmeta data-mint-head name=\"description\" content=\"From signing in to your first query and your first AI agent connection.\">\u003cmeta data-mint-head name=\"application-name\" content=\"Dippr\">\u003cmeta data-mint-head name=\"generator\" content=\"Mintlify\">\u003clink data-mint-head rel=\"apple-touch-icon\" type=\"image/png\" sizes=\"180x180\" href=\"/favicons/apple-touch-icon.png\">\u003clink data-mint-head rel=\"icon\" type=\"image/png\" sizes=\"32x32\" href=\"/favicons/favicon-32x32.png\">\u003clink data-mint-head rel=\"icon\" type=\"image/png\" sizes=\"16x16\" href=\"/favicons/favicon-16x16.png\">\u003clink data-mint-head rel=\"shortcut icon\" type=\"image/x-icon\" href=\"/favicons/favicon.ico\">\u003cmeta data-mint-head property=\"og:title\" content=\"Quickstart - Dippr\">\u003cmeta data-mint-head property=\"og:description\" content=\"From signing in to your first query and your first AI agent connection.\">\u003cmeta data-mint-head property=\"og:site_name\" content=\"Dippr\">\u003cmeta data-mint-head property=\"og:url\" content=\"https://local./get-started/quickstart\">\u003cmeta data-mint-head property=\"og:type\" content=\"website\">\u003cmeta data-mint-head property=\"og:image\" content=\"https://docs.dippr.ai/images/social-card.png\">\u003cmeta data-mint-head property=\"og:image:width\" content=\"1200\">\u003cmeta data-mint-head property=\"og:image:height\" content=\"630\">\u003cmeta data-mint-head name=\"twitter:card\" content=\"summary_large_image\">\u003cmeta data-mint-head name=\"twitter:title\" content=\"Quickstart - Dippr\">\u003cmeta data-mint-head name=\"twitter:description\" content=\"From signing in to your first query and your first AI agent connection.\">\u003cmeta data-mint-head name=\"twitter:image\" content=\"https://docs.dippr.ai/images/social-card.png\">\u003cmeta data-mint-head name=\"twitter:image:width\" content=\"1200\">\u003cmeta data-mint-head name=\"twitter:image:height\" content=\"630\">\u003cmeta data-mint-head name=\"msapplication-config\" content=\"/favicons/browserconfig.xml\">\u003cmeta data-mint-head name=\"apple-mobile-web-app-title\" content=\"Dippr\">\u003cmeta data-mint-head name=\"msapplication-TileColor\" content=\"#0B7A9F\">\u003clink data-mint-head rel=\"canonical\" href=\"https://local./get-started/quickstart\">\u003clink data-mint-head rel=\"alternate\" type=\"application/xml\" href=\"/sitemap.xml\">\u003clink data-mint-head rel=\"alternate\" type=\"text/markdown\" href=\"/get-started/quickstart.md\">\u003cscript data-mint-head type=\"application/ld+json\">{\"@context\":\"https://schema.org\",\"@type\":\"WebSite\",\"name\":\"Dippr\",\"publisher\":{\"@type\":\"Organization\",\"name\":\"Dippr\"},\"provider\":{\"@type\":\"Organization\",\"name\":\"Mintlify\",\"url\":\"https://mintlify.com\"}}\u003c/script>","agentPointerHref":"/get-started/quickstart.md","siteName":"Dippr","nav":{"tabs":[{"tab":"Documentation","groups":[{"group":"Get started","pages":[{"title":"Dippr documentation","sidebarTitle":"Overview","href":""},{"title":"How Dippr fits together","href":"/get-started/concepts"},{"title":"Your first run","description":"Name your workspace, hand your coding agent one prompt, and watch the Overview follow along until your first app is live.","href":"/get-started/first-run"},{"title":"Quickstart","href":"/get-started/quickstart"},{"title":"Build and share your first app","description":"Ask your AI agent for a dashboard on your Dippr data, publish it as a data app, and send a colleague a link that shows them only the rows their access allows.","sidebarTitle":"Your first app","href":"/get-started/first-app"},{"title":"Create a workspace","sidebarTitle":"Create a workspace","href":"/get-started/create-a-workspace"},{"title":"Roles and personas","href":"/get-started/roles-and-personas"},{"title":"Set up a tenant","href":"/get-started/set-up-a-tenant"},{"title":"Settings","sidebarTitle":"Settings","href":"/get-started/settings"}]},{"group":"Sign in and identity","pages":[{"title":"Sign in to your workspace","sidebarTitle":"Sign in","href":"/identity/signing-in"},{"title":"Invite a user","href":"/identity/invitations"},{"title":"Act as a role","href":"/identity/act-as-role-switcher"},{"title":"Manage members","href":"/identity/users-and-members"},{"title":"Service users and API keys","href":"/identity/service-users-and-api-keys"},{"title":"Connected apps","href":"/identity/connected-apps"},{"title":"Configure roles, row filters and column masks","sidebarTitle":"Configure roles","href":"/identity/roles-and-permissions"},{"title":"Access log","href":"/identity/access-log"}]},{"group":"Data sources","pages":[{"title":"Data sources overview","sidebarTitle":"Overview","href":"/integrations/overview"},{"group":"Connect a source","pages":[{"title":"PostgreSQL integration","sidebarTitle":"PostgreSQL","href":"/integrations/postgres"},{"title":"Amazon Redshift integration","sidebarTitle":"Amazon Redshift","href":"/integrations/redshift"},{"title":"ClickHouse integration","sidebarTitle":"ClickHouse","href":"/integrations/clickhouse"},{"title":"Snowflake integration","sidebarTitle":"Snowflake","href":"/integrations/snowflake"},{"title":"Google BigQuery integration","sidebarTitle":"Google BigQuery","href":"/integrations/bigquery"},{"title":"Google Sheets integration","sidebarTitle":"Google Sheets","href":"/integrations/google-sheets"},{"title":"Jira Cloud integration","sidebarTitle":"Jira Cloud","href":"/integrations/jira"},{"title":"DuckDB integration","sidebarTitle":"DuckDB","href":"/integrations/duckdb"},{"title":"Iceberg REST catalog integration","sidebarTitle":"Iceberg REST catalog","href":"/integrations/iceberg-rest"}]},{"title":"Cloud credentials","href":"/integrations/cloud-auth"},{"title":"SSH tunnels","href":"/integrations/ssh-tunnels"},{"title":"Test connection and secrets","href":"/integrations/test-connection-and-secrets"}]},{"group":"Secrets","pages":[{"title":"Secrets overview","sidebarTitle":"Overview","href":"/secrets/overview"},{"title":"Secrets in the console","sidebarTitle":"In the console","href":"/secrets/console"},{"title":"Request a secret value","sidebarTitle":"Request a value","href":"/secrets/request-a-value"},{"title":"Secret access and privileges","sidebarTitle":"Access","href":"/secrets/access"}]},{"group":"Data planes","pages":[{"title":"Data planes overview","sidebarTitle":"Overview","href":"/data-planes/overview"},{"title":"Register a data plane, or join one","sidebarTitle":"Register or join a plane","href":"/data-planes/register-and-join"},{"title":"Install a data plane in your cluster","sidebarTitle":"Install in your cluster","href":"/data-planes/install-byoc"},{"title":"Data plane certificates","sidebarTitle":"Certificates","href":"/data-planes/certificates"},{"title":"Customer-operated data plane profile","sidebarTitle":"Customer-operated profile","href":"/data-planes/byoc-profile"},{"title":"Reading data plane status","href":"/data-planes/status"},{"title":"Data plane network requirements","sidebarTitle":"Network requirements","href":"/data-planes/network-requirements"}]},{"group":"Query engines","pages":[{"title":"Query engines overview","sidebarTitle":"Overview","href":"/engines/overview"},{"title":"Create an engine","href":"/engines/create-an-engine"},{"title":"Sizes and plans","href":"/engines/sizes-and-plans"},{"title":"Catalogs and Apply","href":"/engines/catalogs-and-apply"},{"title":"Power and scale to zero","href":"/engines/power-and-scale-to-zero"},{"title":"Connect to an engine","href":"/engines/connect"},{"title":"Engine sign-in and OAuth","href":"/engines/oauth"},{"title":"Health and metrics","href":"/engines/health-and-metrics"}]},{"group":"Explore and queries","pages":[{"title":"Browse the catalog","href":"/explore/catalog-browser"},{"title":"SQL workbench","href":"/explore/sql-workbench"},{"title":"Query history","href":"/explore/query-history"},{"title":"Table lineage","sidebarTitle":"Lineage","href":"/explore/lineage"},{"title":"Metadata search","sidebarTitle":"Search your data","href":"/explore/search"},{"title":"Configure search indexing","href":"/explore/search-indexing"}]},{"group":"Semantic layer","pages":[{"title":"Semantic layer overview","sidebarTitle":"Overview","href":"/semantic/overview"},{"title":"Create models and metrics","href":"/semantic/models-and-metrics"},{"title":"Questions and review","href":"/semantic/questions-and-review"},{"title":"Ontology concepts","href":"/semantic/ontology-concepts"},{"title":"Relationships and bindings","href":"/semantic/relationships-and-bindings"},{"title":"Export and import","href":"/semantic/export-import"}]},{"group":"Marketplace","pages":[{"title":"Marketplace overview","sidebarTitle":"Overview","href":"/marketplace/overview"},{"title":"Install a listing","href":"/marketplace/install-a-listing"}]},{"group":"Automations and agents","pages":[{"title":"Scheduled automations","sidebarTitle":"Automations","href":"/agents/routines"},{"title":"Run and review agents","href":"/agents/console"}]},{"group":"Git repositories","pages":[{"title":"Plane-local Git","sidebarTitle":"Overview","href":"/git/overview"}]},{"group":"MCP and AI agents","pages":[{"title":"MCP overview","sidebarTitle":"Overview","href":"/mcp/overview"},{"title":"Connect an AI agent","href":"/mcp/connect-claude"},{"title":"MCP tools reference","sidebarTitle":"MCP tools","href":"/mcp/tools"},{"title":"Scopes and consent","href":"/mcp/scopes-and-consent"},{"title":"Agent skills","href":"/mcp/agent-skills"}]},{"group":"Data apps","pages":[{"title":"Data apps overview","sidebarTitle":"Overview","href":"/apps/overview"},{"title":"Build a data app","href":"/apps/authoring"},{"title":"Author an agent","href":"/agents/authoring"},{"title":"Write the app manifest","href":"/apps/manifest"},{"title":"Build and push an image","href":"/apps/lifecycle"},{"title":"Manage the app registry","href":"/apps/registry"},{"title":"Install an app","href":"/apps/install-and-consent"},{"title":"Use an installed app","href":"/apps/using-apps"}]},{"group":"Pipelines","pages":[{"title":"Pipelines overview","href":"/pipelines/overview"},{"title":"Pipeline owner","href":"/pipelines/owner"},{"title":"A pipeline's runs and results","href":"/pipelines/runs"}]},{"group":"Files","pages":[{"title":"Upload and download files","sidebarTitle":"Upload and download","href":"/files/upload-and-download"}]},{"group":"Documents","pages":[{"title":"Documents overview","sidebarTitle":"Overview","href":"/documents/overview"}]},{"group":"Workspace databases","pages":[{"title":"Workspace databases overview","sidebarTitle":"Overview","href":"/databases/overview"},{"title":"Connect and write to a database","href":"/databases/connect-and-write"},{"title":"Load data","href":"/databases/load-data"},{"title":"Import from connected apps","sidebarTitle":"Import from apps","href":"/databases/import-from-connected-apps"},{"title":"Query and share a database","sidebarTitle":"Query and share","href":"/databases/query-and-share"}]}]},{"tab":"dip CLI","pages":[{"title":"dip CLI","href":"/cli/overview"}]},{"tab":"Reference","pages":[{"title":"Reference","href":"/reference/glossary"}]}]},"basePath":"","title":"Quickstart - Dippr","buildId":"008b790582d6","dynamics":["07c022d89b","a74be98ba7"],"chunks":["Frame-AS5D1RQr.js","DynamicMarkdown-CQ3MBZZa.js","zoom-image-lightbox-C0Ucd32p.js","lightbox-handle-r17bVUz3.js"]}